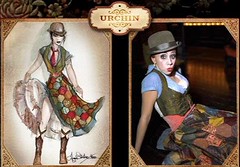
The patchwork looked to be the most time consuming part of this project and I decided that I would begin there because it was something I thought I could manage with minimal advise. If I didn't make a start I thought I never would!
I bought ten colours of cotton quilters material and spent around 5 hours with a hexagon template cut from cardboard drawing hexagons and cutting material... What a job! Each Hexegon is 12cm across in each direction giving me a centimetre seam allowance all the way around. I tried to keep the colours in darker neutral shades as I interpret the photos from the Moulin Rouge.
Just when I thought I would surely slip into madness it was over and I could begin sewing... right after I ironed every single patch (another tedious task).
The sewing progressed a lot quicker than I thought and after not too much deliberation I had two rows of patches sewn. I decided to sew concentric circles of patches so that I ended up with a circle without any obvious break in the pattern.
Over several days and several more hour long sessions I was up to the sixth row of patches. Although I thought it would be more difficult the hexagon shapes are joining together quite easily. I think sewing them in circles helps to fix any small errors that may creep in.
Of course I am not too worried about this being completely flat like a quilt, but I was worried that keeping it in two pieces would warp the pattern when it came to sewing up the sides. My original idea was to sew a zip or some kind of fastening into either side to enable the skirt to be put on without breaking the pattern with anything. I think now that I will use elastic around the waste as this should be covered with the waist cincher.
I finally found the colour for the petticoat ruffles! I don't know how many times I've freeze-framed the movie looking for shots of urchin and finding only a few un-useful shots. The screen capture I found shows Urchin’s petticoats which are purple; very different from the design sketches. What great timing for me, merely hours from going shopping for the petticoat material (which I nearly bought in cream two days ago!)
I bought cotton voile in three colours - black, plum and floral plum. The black was used as a base for the ruffles which is a simple circle skirt 80cm long. Next I mass produced ruffles by cutting lengths 13cm wide and doing a rolled hem on one side and a zigzag on the other. A machine that can do a rolled hem is extremely handy to have. Cotton voile apparently doesn't fray if it is ripped along the weft, but I didn't want to take any chances and I have a lovely finish even though it took much longer.
Eight layers later the ruffles are starting to look great and took 5 metres of material to construct. The plum was not as wide as the patterned material so I had initially bought three metres of it and two of the patterned. The first ruffle took 6 metres of material and the 8th took 4 metres.
A few more layers and I'll be up to my waist and able to attach the patchwork to the other side. These layers took me another 4 evenings to complete and believe me I am very tired of ruffles!
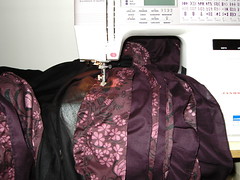
I realized that I had extremely underestimated the amount of material I would need for the grey border around the bottom of the skirt. I had bought only half a metre, but I really need a complete circle strip because a straight stip would not sit flat because the skirt is constructed from a simple circle skirt pattern. I bought 3 more metres of grey but as it was only 114cm wide I had to improvise for the back and cut it out of two pieces.
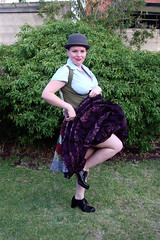
I have just made enough patchwork to go up to the grey border which was constructed out of two half circle strips. The ruffle skirt was attached around the grey border and then the patchwork was trimmed to the waist and attached to the waistband. One problem I encountered was not only that the black ruffle base was slightly larger than my patchwork circle (despite careful measuring), but also that the ruffles are so heavy that I had to use umpteen tacking stitches under the first ruffle into the inner side of the grey border to hold the ruffles in place better.
More photos of the construction on flickr.


