
Difficulty: Easy
Total Time: 6 hours
I photocopied the pattern out of Gosu Rori vol 4, but the pattern itself could be adapted to any soft toy where you can put a zip up the back. I only got cheap toy fur because I am probably only going to use the bag once and at the beginning I wasn't sure how it would turn out and didn't really want to spend up to $60 on fur. So my "scrooge" side won out on this one.
I used about 60cm of fake fur. One tip is to make sure you pay close attention to the way the fur will go. I drew each piece on to the back of the fur, but if you do that make sure you two each of the front and back of the pieces (ie. you need to turn over your paper pieces and do the other side too)
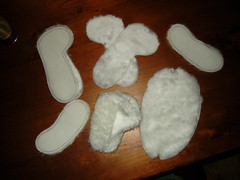
Next carefully cut the fur out. Because the fabric is fur you need to try to cut between the fur follicles. You can see why by having a look at where the shop assistant cut the fur. It is all ratty because the fur was cut through. You need to try not to cut through the fur, just the backing material.
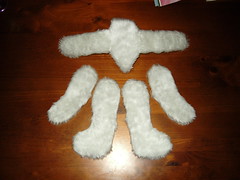
Finally you can start to sew the pieces together. For the head I sewed the ears into the top seams where the gusset joins the sides of the head together. The arms, legs and ears are all relatively straight forward to sew together. After each piece is together turn it the right way and carefully pull the fur out of the seam lines.
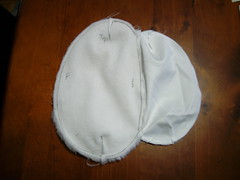
The instructions for the body didn't include a lining for the bag itself and I wondered how the bunny would look if it had my wallet, keys and other things inside without having a little stuffing in there too so that he keeps his shape. I used the original body pattern to draw a smaller shape for my gusset and cut it out of white cotton. First I sewed the zip onto the fur and sewed around the fur leaving a small opening in the front. Next I sewed both pieces of cototn lining to the zip as well so that all the seams would end up in the bunnies tummy. Then I sewed around the lining without leaving a gap. I could turn the stomach in the right way through the gap in the fur seam and then after attaching the arms and legs (described next) I lightly stuffed either side of the stomach lining.
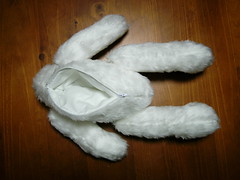
I used some blue toy eyes and some simple plastic arm and leg joints which you can get from the "teddy bear" area in your craft shop. With some of these things you either need to be quite strong to put them together, or use a pair of pliers. You can join each of the arms and legs to the body and then stuff the arms and legs and sew the holes closed.
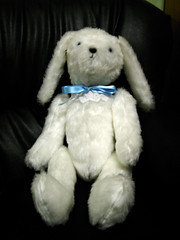
Finally the head is stitched to the top of the body with a piece of ribbon coming out of the back of the neck seam as a handle. Then I added some lace and a blue ribbon around his neck and stitched on his nose with black cotton embroidery thread.
No comments:
Post a Comment