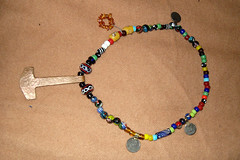
The Vikings loved their colourful glass beads and different findings and sometimes pieced them together to form muddled necklaces full of colour and "treasures".
Difficulty: Easy
Total Time: 2 Hours
Documentation
Finding beads today that would have been available during the Viking era can be a daunting task. I went to a local bead shop armed with colour print-outs from various websites and spent a good hour looking through different beads and picking out a couple here, one there, a half dozen somewhere else. Some beads I even found on e-bay and had them shipped specially.
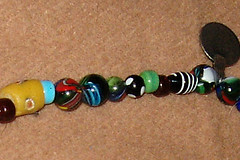
These are just a small selection of beads which I managed to find replicas for today (extant on left):
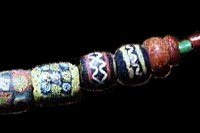
The large red, white and black bead is similar to the ones from the necklace manufactured in Scandinavia c 800 to 1000 CE. This extant necklace also includes some millefiore beads, demonstrating that this type is not post-rennaisance.
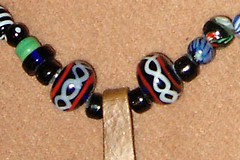
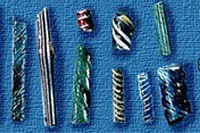
The glass debris displayed here were found in a Viking Age glass-worker's shop in Ribe, Denmark and are reminiscent to several that I included on my necklace. This segment of my design also shows millefiore beads and an eye bead.
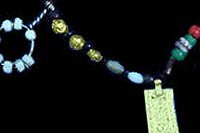
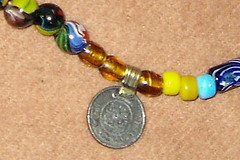
This is a 9th cent. treasure necklace from the hoard from Hon in Norway. It is special in that it contains many golden pieces, whereas most featured silver items. I am displaying a segment that includes gold foil beads , a pendant of glass beads woven onto wire, and a pendant hanging from an attached loop. My design includes gold foil beads and a pendant with amber (later removed in favour of a fourth coin pendant), but shown is an old Islamic coin (1920's?) made into a pendant.
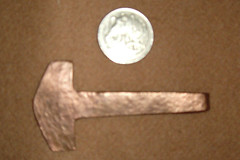
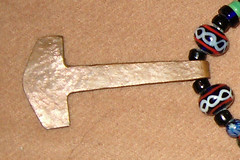
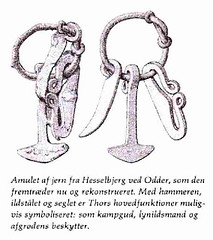
Hammers of this general type were distributed widely. They were cut from a single sheet, and the top was bent over to form the loop. The one I re-created is modeled after one found in Hesselbjerg, Denmark and I made it out of a piece of brass. The basic shape was cut with tin snips, then the edges were filed smooth. Next we used a hammer to "weather" the brass and make a little loop at the top and lastly it was polished. Pictured is my re-creation with an Australian 20 cent piece and the hammer on the necklace.
Construction
The difficult thing about constructing a treasure necklace is to throw away all of our modern concepts of form, colour and symmetry. The Vikings prized a mixture of colours and collected many types of beads and items converted to serve as pendants.
The Viking Answer Lady offers directions for the construction of a treasure necklace and we shall follow them.
Step One: Arrange special beads and pendants
I started by laying out the coin pendants and the special Thor's Hammer in a rough circle on my table in approximate distances from each other.
Step Two: Make more pendants if desired with beads and wire
I created a pendant by stringing tiny amber chips onto a length of wire and then twisting the ends together to form a "stalk" which is used as the loop of the pendant. This technique seems to be used mainly to highlight a group of special beads - either the same colour, or ones that are more precious or loved than the others.
Step Three: Place pairs of beads 180° apart across the necklace
Pick up pairs of beads that are similar in size, shape and tone (dark or light) and place them approximately 180° apart across the circle. The beads do not have to be exactly the same colour.
Step Four: Create some short patterns and place remainder beads
Pendants were often emphasised with short patterns, or the same type of bead either side of them. I constructed patterns using my special gold foil beads, or in the case of the Thor's Hammer, by setting it off with my large glass beads. I also set off pendants by using the same colour and type of bead to either side of it.
Step Six: Pick a point and string your necklace
I picked the point I thought would be at the back of the neck to string my necklace. I threaded it on a heavy linen thread that I waxed prior to stringing.
Additional Resources
Thor's Hammer - Extant Photos
The Viking Answer Lady - Viking Beads
Monday, February 28, 2005
Subscribe to:
Post Comments (Atom)

No comments:
Post a Comment