Dejiko Shoes are a relatively easy shoe cover because you have a little wriggle room for making mistakes since it doesn't need to be a tight cover and you will be using stuffing to create the shape you need.
Difficulty: Medium
Total Time: approx 8 hours
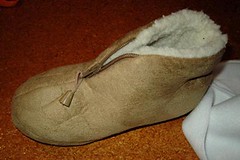
First find a cheap, comfortable pair of slippers to use as your base. Mine cost less than $10 and there didn't seem to be a left and a right foot so they were perfect for this application.
The boot cover itself is a bit like a horseshoe shape with the open end of the horse shoe sewn so the seam is at the back of the heal on the boot. Depending on what kind of slipper you have bought will potentially change the shape of your shoe cover.
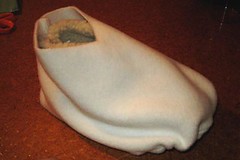
Get some scrap material and start by making a horseshoe shape that can cover the boot. Don't worry about the toe at this stage (you need a little excess there), but when you sew a seam up the back make sure you can get it over the boot and so that the top is around your ankle height. Have a close look at the pictures. Then cut your pattern out of your polar fleece.
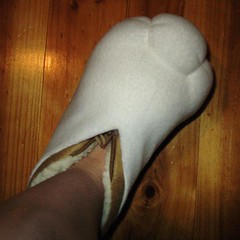
Use a long stitch along the front of the boot cover and gather in the toe, then stitch up the back and line up your shoe cover. Use pins to hold it in place and gather more or less until the bottom of the boot cover fits snuggly over your slipper. Using a curved needle stitch your boot cover close to the sole of the slipper.
Next lightly stuff the front of the boot cover on top of the slipper until you have the desired "fluffiness" and, using a long matress needle, take a length of cotton in through the material and stuffing close to the sole and up out of the top of the foot being careful not to pierce the slipper. Pull the cotton tight, tie and hide the ends. This will form the toes.
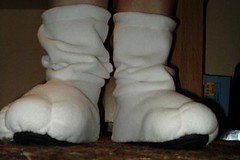
Next make a "leg warmer" out of a tube of material. Hem the top and insert some elastic to hold them up. The bottom should be the same size as the opening you have for your shoe cover. Line up the bottom of the boot cover with the top of the shoe cover and carefully stitch around them. Because there is some looseness around your leg it doesn't matter if it isn't perfect and you won't see this seam.
Finally add your ribbon trim and you're done!
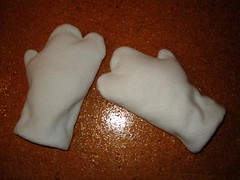
The gloves are made in very much the same way.
I used a cheap pair of acrylic wool gloves that I bought for approx $2 and used the left over polar fleece. The pattern for the top is larger than the bottom pattern and I have created a hint of two fingers and a thumb so they are reasonably functional for carrying things, but not for doing anything more specific such as using a mobile phone or retrieving money from a wallet.
First sew the top and bottom together and leave inside out. Place the real 5-finger glove onto the inside out dejiko glove and stitch the fingers into place around the tips and down either side of the hand. Now turn your glove in the right way so that the real glove is inside and lightly stuff the top, leaving the palm unstuffed. Now turn the polar fleece in at the wrists and stitch to keep the stuffing in place.
Thursday, July 26, 2007
Subscribe to:
Comments (Atom)

