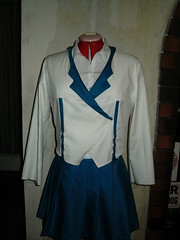
I started the jacket off with a simple pattern from my Gosu Rori vol 6 magazine. The jacket originally had three pieces for the back and two pieces either side for the front width a zip down the middle. I needed to alter the back to have a centre seam and work out the strange horizontal seam for the front, however my pattern had the advantage of having a vertical seam down the front on either side, so I thought I was half way there.
After making the mock up, I found that the sleeves were not fitting me properly and I forgot to leave a large excess on either side of the front. I added another piece of material and then pinned the whole thing onto my dress form. It took me a little while to get my head around what I was actually doing. I pinned the front so that I got a fold that looked to me like the natural fall of a collar then sketched this out with tailors chalk. Then I tried to follow a basic shape for the fold over front and cut this out, trying to make the other side the same as well.
Then I tentatively cut my mock up into pieces to make the new pattern. This was probably the most nerve wrecking part! Finally I had sewn my next mock up and I tried to make the sleeves a little larger as well. After trying it on I found that I was fairly happy with my pattern, but the upper arm was still a little tight and would need to be altered again.

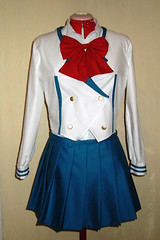
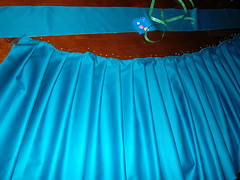
I bought 3 metres of cotton drill in white, though now I can see that two would have been plenty. I got the extra incase I made a huge mistake. I cut all my pieces again and then found my blue material and spent most of the day wondering how I would do the blue vertical stripes on the front. I ended up cutting two lengths of blue about an inch wide and sewing them between the white. This meant that my pattern was thrown slightly out because it is 1cm wider due to the blue. I widened the sleeves at the top, and had to carefully pin these in before I could sew them. This meant another alteration to the overall pattern as they now come down below the horizontal line. They are still a little tight, but much better than they were and I have had enough of altering for this costume!
Before sewing on the collar I tried the jacket on again and then put it back on the dress form. Something wasn't quite right and I ended up unpicking the horizontal seam at the bust back to the blue line and taking about 1.5cm off it. It sits a lot better with that small alteration.
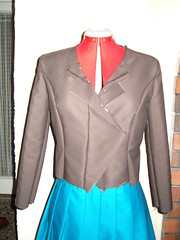
The collar was quite hard, and I'm sure that there is an easier way, although I also think that perhaps if i wasn't trying to end up with a blue collar on a white jacket (or if it was done out of a thinner material) then the task would have been easier. I cut the collar pattern out of white and blue, then sewed the white onto the jacket. Next I sewed the blue onto the white and pressed it into place so that I could sew where it folds into the neck too. It was quite frustrating to get it just right and I don't have a lovely collar coming to a point. I'm not 100% happy with it, but I just don't know what else I can do to get the effect.
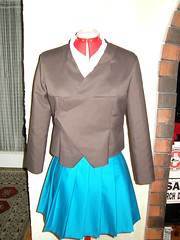
I have adjusted the side of the jacked and the blue lines and am now happier with the way the jacket is sitting. This process took an extra 4 or so hours however, so I have really blown out my time estimate on this garment.
The cuffs here easy. I used more blue material to create two thin lines of blue and then slightly pleated in the back of the sleeve until it was the same size as the cuff. The circumference of the cuff was the minimum size I could still fit over my hand because I did not want to use fastenings on them.